Frontend Scripts
So, you're diving into the world of Zabbix frontend scripts, and you're in for a treat! These little powerhouses unlock a whole new level of flexibility within your Zabbix environment. Imagine being able to trigger custom actions directly from your Zabbix interface – whether it's as an action operation responding to an alert, a manual intervention on a host, or a targeted response to a specific event.
What's truly exciting is where you can weave these scripts into your daily Zabbix workflow. Picture adding custom menu items right within your Hosts, Problems, Dashboards, and even your Maps sections. This means the information and tools you need are always at your fingertips.
Ultimately, frontend scripts empower you to extend Zabbix far beyond it's out-of-the-box capabilities. They provide that crucial extra layer of customization, allowing you to seamlessly integrate your own scripts and workflows directly into the Zabbix frontend. Get ready to harness this power and tailor Zabbix precisely to your needs!
Creating a frontend scripts
For this example, we'll work with a frontend script I developed that lets you put hosts in maintenance mode. This script makes it possible to add a convenient option in your GUI, allowing you to place hosts in maintenance with just a few clicks. You can download the script from my GitHub repository :
https://github.com/Trikke76/Zabbix/blob/master/maintenance/zabbix-maintenance.py
Download this script and place it in /usr/bin/
Our Python script relies on an additional package that needs to be installed before running. Make sure you have this dependency set up on your system before executing the script.
install python3-requests
Red Hat
UbuntuNote
For the user you can use the user Admin or you can create a new user. but
make sure this user has enough permissions to create a maintenance mode.
It's best practice to create a dedicated user for this in production.
Starting with Zabbix 7.2, token-based authentication is required when working with
the API. Each user can create their own tokens, while the Super admin has management
privileges over all tokens.
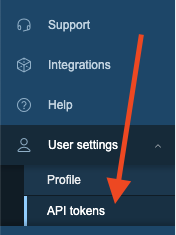
To create a token for your Admin user:
- Navigate to
User settings - Select the
API tokenssections
9.1 User API
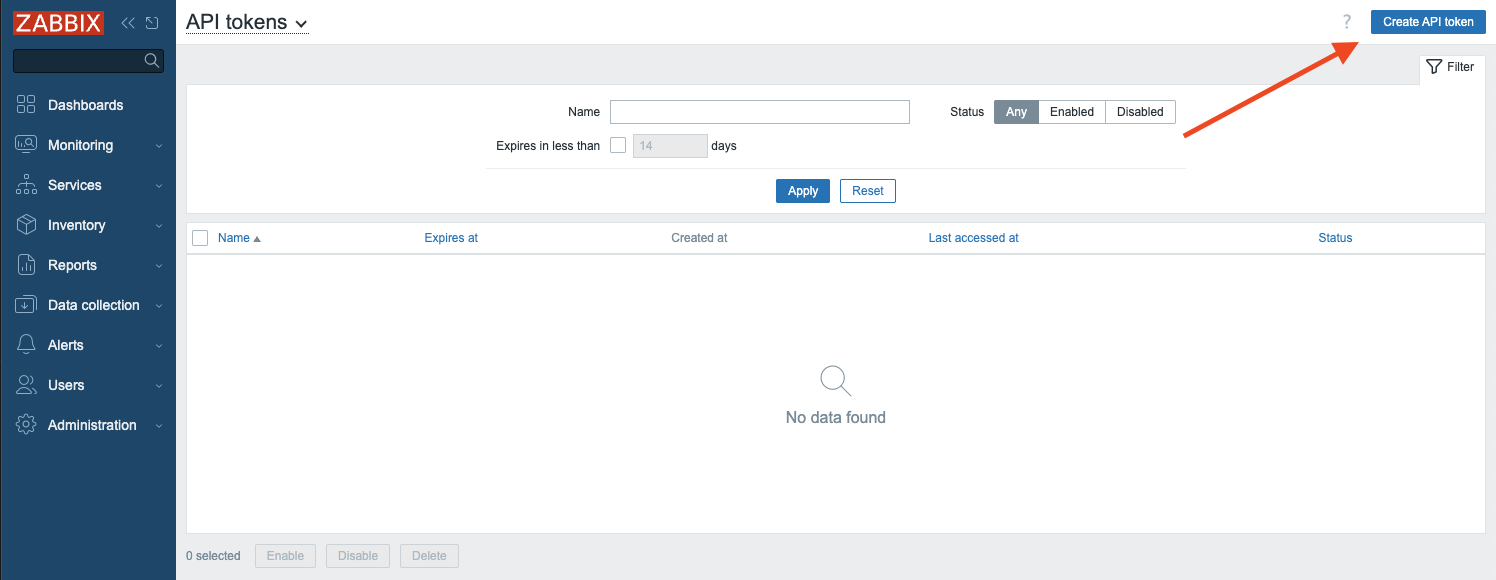
After selecting API tokens from the menu, you'll land on the API tokens page.
Look for the Create API token button in the top right corner and click it to
begin the creation process.
9.2 Create API page
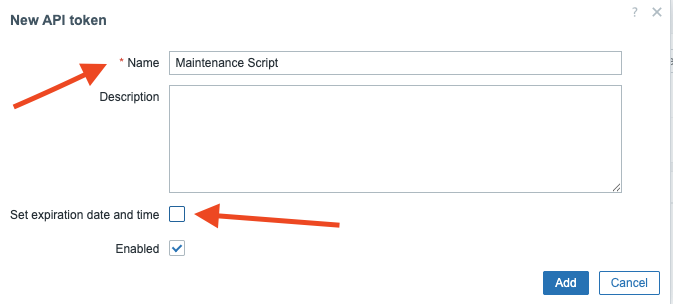
A popup window will appear for creating your new API token. You'll need to provide
a unique Name for your token. While there's an option to set an expiration date,
we'll keep our token active indefinitely by leaving the time limit settings unchanged.
9.3 Create new API token
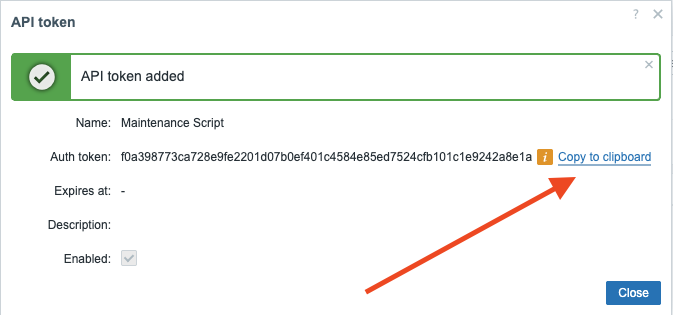
A confirmation popup will display your newly created API token, showing the Auth token
string generated by Zabbix. Be sure to copy or write down this token immediately,
as it will no longer be visible once you click Close. If you lose this token,
you'll need to delete it and create a new one. There's no way to retrieve or view
the token again through the interface.
9.4 Added API token
The next step is updating our script with the proper connection details. Edit the script and modify the variables to include your Zabbix server's correct URL and the token you just created. Pay attention to whether your server uses HTTP or HTTPS protocol. Be sure the URL in your script matches your actual server configuration.
Replace variables
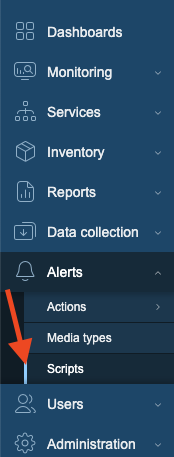
Now that our script is properly configured, we need to set it up in the Zabbix
interface. From the main Zabbix menu, navigate to Alerts and then select Scripts
from the dropdown to access the scripts configuration area.
9.5 Scripts menu
You should already see a few existing script like Ping, Traceroute, .... that's
normal those where created with the installation of Zabbix. Press the button Create scripts
on the top right corner. A now form will popup where we will configure our maintenance
script. Fill out the following fields:
- Name: Create maintenance no data collection
- Scope : Manual host action
- Menu path : Maintenance
- Type : Script
- Execute on : Zabbix proxy or server
- Commands :
/usr/bin/zabbix-maintenance.py create "{HOST.HOST}" {MANUALINPUT} no
At the bottom we have a tab Advanced configuration Click on this and extra configuration
options will appear.
As you probably noticed we used in our Command the macro {MANUALINPUT} this
will be used to gather information from a user prompt. This allows us to ask
the user to fill in the time he wants to place the host in maintenance.
- Enable user input : yes
- Input prompt : How many minutes do you want to place the host in maintenance ?
- Input type : String (A dropdown box can also be used in case you have a list of options)
- Default string : 60 (but we can use anything this will just be the default answer)
- Input validation rule :
(\d+)(our regex in perl to only allow digits) - Enable confirmation : yes
- Confirmation text : Are you sure ?
If everything went well you should end up with a similar looking page :
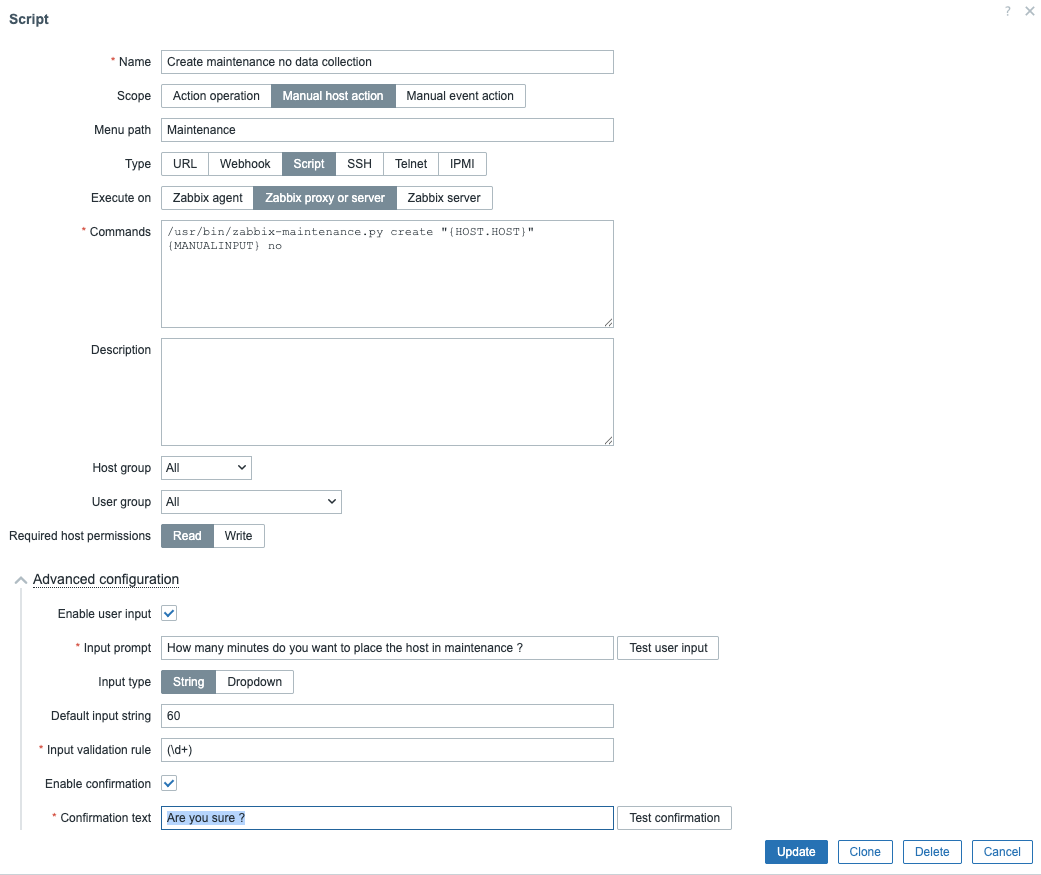
9.6 Script form
When your are ready press Add at the bottom of the form. Let's test our script
to see if it works.
Testing the frontend script
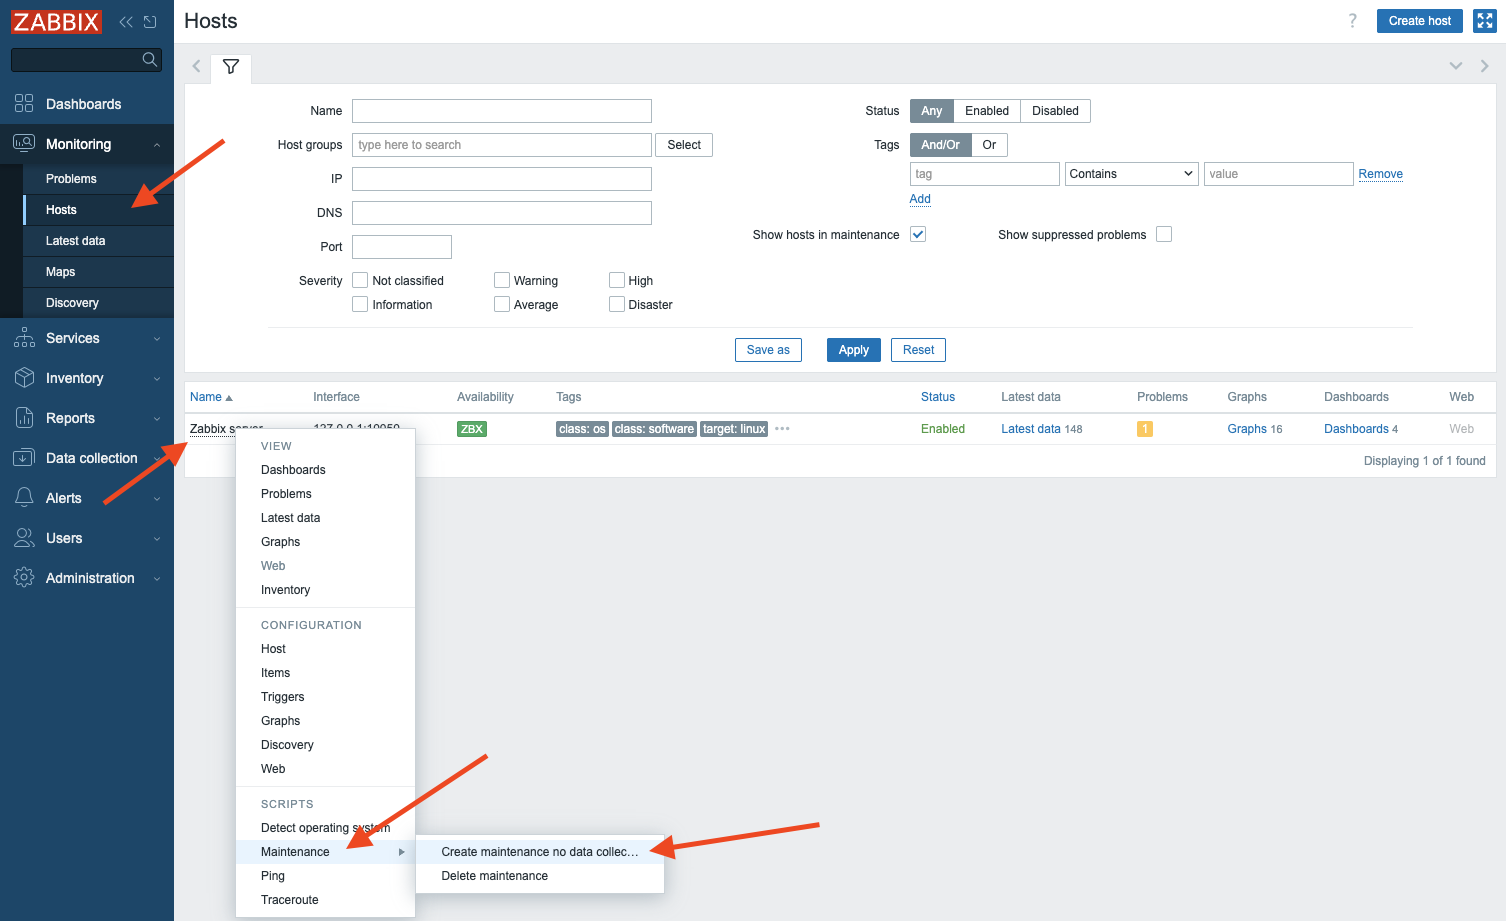
In Zabbix go to the menu Monitoring => Hosts and click on the host Zabbix server
and from the scripts menu select Maintenance and click on the sub Menu
Create maintenance no data collection. You should see a popup asking you how
many minutes you like to place the host in maintenance.
9.7 Create maintenance
When we click continue however we get a popup telling us that Zabbix cannot execute the script.

9.8 Error executing script
This error is normal Zabbix has an option in the configuration file of the Zabbix server
and the proxy that blocks the execution of global scripts.
We get a notification that Zabbix cannot execute the script. The config file
has an option to block global executions by default in the server or proxy config
activate the option "EnableGlobalScripts=1". Go to the Zabbix server configuration
file with you favourite editor and enable the parameter and restart the server service.
If all goes well this time you will see a popup telling you it was successful this time.
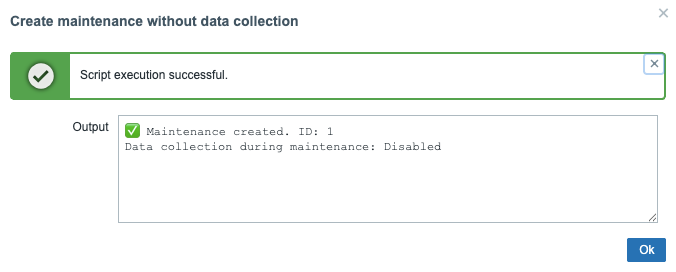
9.9 Maintenance successful
When we look in our Zabbix menu under Data collection => Maintenance we can see
that a new maintenance was created for our host with the time we had specified.
This will allow us to create Maintenance windows for hosts from the frontend with
only a few clicks.
Even better we are now able to allow certain non Admin users to create maintenance periods
for hosts without the need to give special access rights or create special profiles.
We have in our config of our script the option to limit the use of this frontend script
to certain Host groups and User groups.
Tip
You can now create the same script but add the option yes instead of no
when it comes to data collection and you can also create a script to delete
the maintenance period by just replacing create with delete and remove
all options after "{HOST.HOST}". This way you are able to create maintenance periods
and delete them when not needed anymore per host.
Conclusion
Congratulations! You've reached the end of this journey into Zabbix frontend scripts. By now, you should have a solid understanding of how to create, implement, and manage these tools to extend Zabbix's functionality.
We've covered a lot of ground, from the initial steps of crafting your own scripts to seamlessly integrating them into the Zabbix frontend. You've learned how to gather user input to make your scripts more dynamic and versatile, and, crucially, how to configure user and host permissions to maintain a secure and controlled Zabbix environment.
The ability to tailor Zabbix to your specific needs with frontend scripts is a significant advantage. It allows you to automate repetitive tasks, streamline workflows, and gain deeper insights into your infrastructure. Whether you're automating routine checks, creating custom dashboards, or integrating with external systems, the knowledge you've gained here will enable you to effectively leverage Zabbix.
Remember, the examples and techniques presented in this book provide a foundation. The true power of Zabbix frontend scripts lies in their flexibility and your ability to adapt them to your specific needs. As you continue to explore and experiment, you'll discover new ways to enhance your monitoring capabilities and optimize your Zabbix setup.
Questions
- Why are Zabbix frontend scripts useful?
- What are some ways Zabbix frontend scripts can help automate tasks?
- Why is it important to configure user and host permissions when using Zabbix frontend scripts?
Useful URLs
- https://blog.zabbix.com/setting-up-manual-ticket-creation-using-zabbix-frontend-scripts/15550/
- https://www.zabbix.com/documentation/current/en/manual/web_interface/frontend_sections/administration/scripts
- https://github.com/Trikke76/Zabbix/tree/master/maintenance