Zabbix Agent Active monitoring
In the previous part we installed our Zabbix agent and started monitoring a host in the Passive mode. When we use Passive mode the Zabbix server or proxy will connect to the Zabbix agent and request specific item data. The item data is returned within the same TCP session. From a security aspect this means that we need to allow our Zabbix servers or proxies to connect to many different servers.
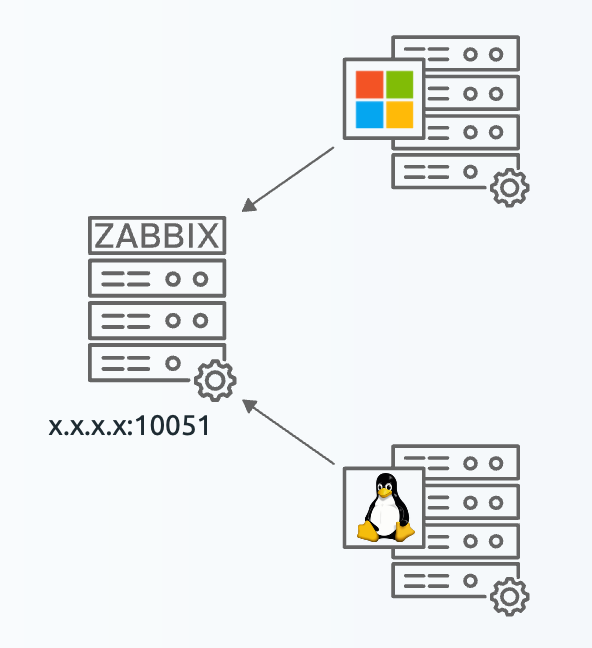
For security reasons this might not be the best course of action. Instead let's look at the Zabbix agent in Active mode. In Active mode or Zabbix agent will be configured to initiate the connection to the Zabbix server or proxy. It will request its configuration data and receive it back in the same TCP session. After receiving its configuration it can then start sending the item data according to the configuration received. The connection as such is always initiated from the Zabbix agent side, meaning you will allow your many agents to connect to your Zabbix servers or proxies instead.
4.24 Zabbix Agent active hosts
Setting up the active agent
It's possible to set-up a Zabbix agent to work in both passive and active mode at the same time. Sometimes, we see this as passive mode was being used but an active only check is added later. The Zabbix agent in active mode can execute all item keys, whereas the passive agent cannot execute log item keys. Another reason to prefer active mode in most cases. For clarity, in our example we will use a different linux and windows server for the active agent. We will call these hosts:
- zbx-agent-active-rocky
- zbx-agent-active-windows
Because the Zabbix active agent will need to know where to request its configuration and where to start sending data, the setup for the active agent is quite different. The set-up process however is the same for both Linux and Windows. Let's start by editing the Zabbix agent configuration file.
open Zabbix agent configuration file
Linux usually:
``` vim /etc/zabbix/zabbix_agent2.conf
Once the configuration is open, there are two important parameters in the configuration file. First, let's make sure our Zabbix agent will know where to connect to.
edit ServerActive parameter
ServerActive=192.168.46.30
In the example 192.168.46.30 is the IP address of our Zabbix server (or proxy). Do not forget to remove 127.0.0.1 in this case. Its important to remember that our Zabbix agent in active mode will connect to every single IP address or DNS name entered in the ServerActive= parameter. Unlike Server= which functions as an allowlist.
Next up, our Zabbix agent needs to know which configuration data to collect. It will connect to the Zabbix server (or proxy) on the IP specified and send over its Hostname= parameter. By default this is set to Hostname=Zabbix server which is incorrect in all cases except the Zabbix server itself. Lets change the configuration.
edit Hostname parameter
Linux:
``` Hostname=zbx-agent-active-rocky
It is also possible to comment the #Hostname= parameters, in which case it will use the system.hostname item key to determine the hostname. This makes it easy for environments where the hostname is the same on the system as it will be in Zabbix (best practice).
There is also the HostnameItem= parameter which you can use to set your own item to determine the hostname used. This can be an existing item, but also a UserParameter (more on those later). With this functionality, you can even execute a bash or powershell script to set a custom hostname like that.
With this configuration set you can restart the Zabbix agent to make the changes take effect. In Windows restart the service, for Linux issue the command below.
restart Zabbix agent
systemctl restart zabbix-agent2
This finalizes the configuration file changes. Now we need to configure the host in Zabbix.
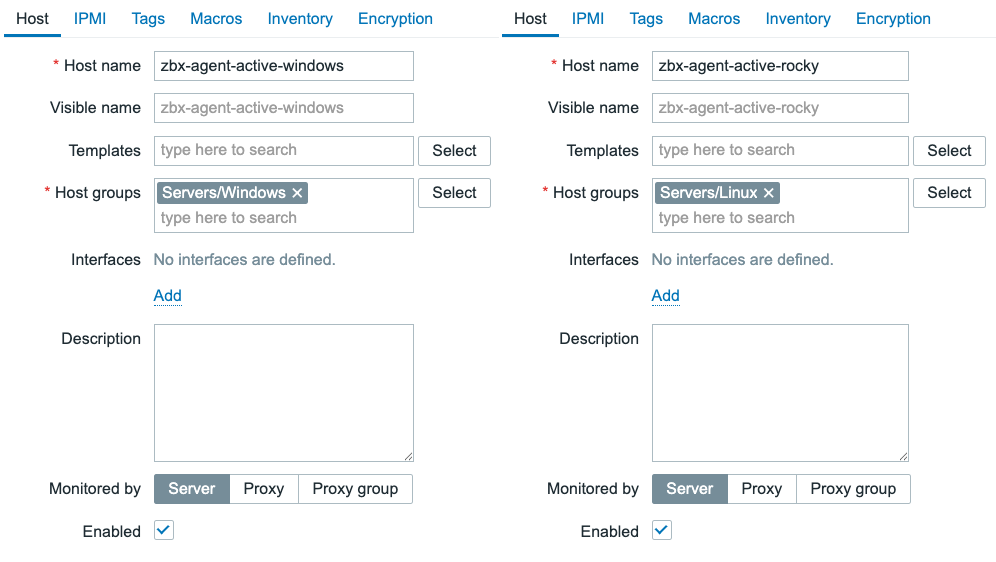
4.25 Zabbix Agent active hosts in Zabbix
All we need to do here is make sure to match the hostname of what we configured in the Zabbix agent configuration file. Keep in mind that the Hostname field has to match the Hostname= parameter in the configuration file. The Visible name field does not have effect on the active agent functioning.
We also add the host to the correct host group and that is all for now.
Creating active items
Now that these settings all configured we can now start to create some items on our active agent host in Zabbix frontend. Let's click on Items for our host and configure a new Zabbix active type items.
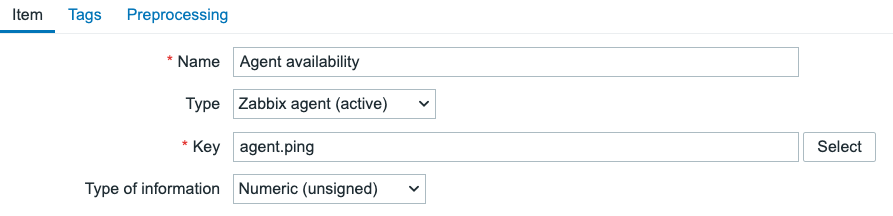
4.26 Zabbix Agent active item
Make sure to set the item Type to Zabbix agent (active). Most item keys will be the same between Passive and Active mode, but the Type needs to be set correctly.
Also, do not forget to add the tag to this item.
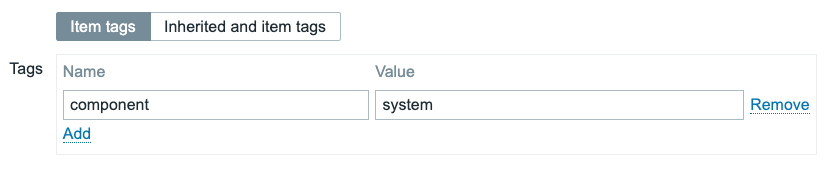
4.27 Zabbix Agent active item tag
Your ZBX icon for this host should now turn green, even in active mode.
Conclusion
Zabbix agent in Passive and in Active mode are quite similar. Their main difference being their methods of communications and some different functionalities outside of their core functions being the same. One big difference we haven't mentioned yet however is timestamps. The Zabbix server or proxy communicating with a Zabbix agent inPassive mode adds the timestamp for a collected value at the Zabbix server or proxy side. In Active mode however the timestamp is added directly upon item value collection on the Zabbix agent side. This makes the Zabbix agent in Active mode more accurate with timestamps, but more sensitive for incorrect time settings on your monitoring targets. Keep in mind to set-up NTP when using the Zabbix agent in Active mode, a good idea even outside of Zabbix monitoring. The Zabbix agent in Active mode will always use UTC+0 and send over the timestamp in unixtime.
Finally, let's do a bit of a comparison between the two modes.
| Active Zabbix agent | Passive Zabbix agent | |
|---|---|---|
| Timestamp | Zabbix agent | Zabbix server or proxy |
| (event)log items | Supported | Not supported |
| Port | No port listening, connect to 10051 | Listening on 10050 |
| Hostname | Has to match | Can be anything |
| Remote commands | Supported | Supported |